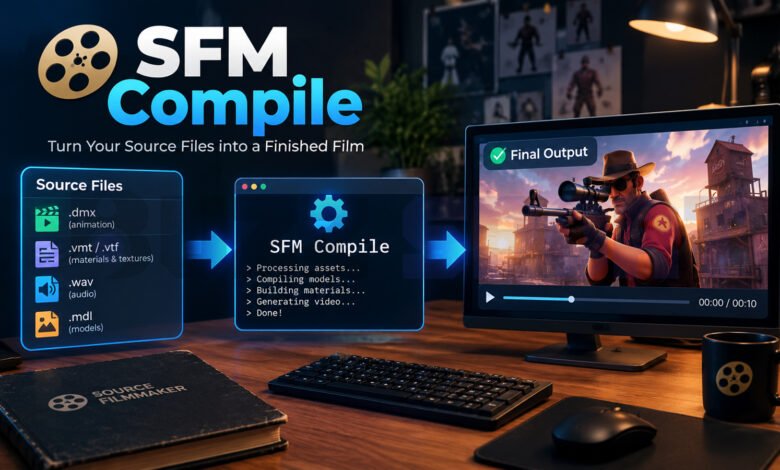
SFM compile is the step that turns a 3D model you made or downloaded into a file that Source Filmmaker can open and use. If you have ever tried to drag a Blender file into SFM and nothing happened, this is the reason. SFM does not read normal 3D files. It needs a special format, and you must build that format yourself with a few free tools. This guide walks you through the whole process in plain steps, from the first export to the final test, and it shows you how to fix the mistakes most new users make.
What does SFM compile mean?
SFM compile means converting your model files into the Source engine format, so Source Filmmaker can load them. Source Filmmaker, often called SFM, is a free movie-making tool from Valve. It runs on the older Source engine, the same technology behind games like Team Fortress 2 and Half-Life 2.
That engine only understands one kind of model file, which ends in .mdl. Your 3D program does not make this file. Instead, you give a compiler the raw parts of the model, plus a set of instructions, and the compiler builds the .mdl for you.
Here is the full path in one line:
3D program → SMD or DMX files → QC file → Crowbar or StudioMDL → MDL file → Source Filmmaker
Each step has a job, and we will go through them one by one.
What tools do you need for SFM compile?
You need a 3D program, a way to export Source files, a text editor, and a compiler. All of them are free. Here is a simple list:
- Blender: A free 3D program. Add the Blender Source Tools add-on, and Blender can export the Source file types you need.
- A text editor: Notepad works, but Notepad++ is nicer because it is easier to read and edit code.
- StudioMDL: Valve’s own model compiler. It is the tool that does the real work. You use it from the command line.
- Crowbar: A free program by a community developer named ZeqMacaw. Crowbar does not compile models by itself. It gives StudioMDL a friendly window with buttons, so you do not have to type commands.
Most beginners should start with Crowbar. It shows the compile log in a clear way, and it can also decompile existing models, which is a great way to learn. You can open a finished model, look at its QC file, and see how other people built it.
One important note: these tools only work with Source engine models, also called Source 1. Games built on Source 2, such as Half-Life: Alyx or Counter-Strike 2, use different formats. Crowbar and StudioMDL cannot compile those.
What files do you need before you compile?
Before you compile, you need mesh files, texture files, and one QC file. Let us look at each one.
SMD and DMX files hold your model data. An SMD file can store a mesh (the shape of your model) or an animation. DMX is a newer format that can also store extra things, such as face shape data. When you export from Blender with Blender Source Tools, each object you export becomes one of these files.
VMT and VTF files are your materials and textures. The VTF file is the image. The VMT file is a small text file that tells the engine how to use that image. If these are missing or in the wrong place, your model will show up with a purple and black checkerboard.
The QC file is a plain text file with the ending .qc. It is the instruction sheet for the compiler. It says what the model is called, which mesh files to use, where the textures live, and which animation to play. Without a QC file, the compiler has nothing to work with.
What is a QC file and how do you write one?
A QC file is a short text file that tells StudioMDL how to build your model. You can write it in any text editor and save it with the .qc ending. Keep it in the same folder as your SMD or DMX files.
Here is a very simple example for a basic prop:
$modelname "custom/my_prop.mdl"
$body "prop" "my_prop_ref"
$cdmaterials "models/custom/my_prop/"
$sequence "idle" "my_prop_idle"
Let us look at each line.
$modelname sets the name and location of the finished model. Every QC file needs it. The path is relative to the models folder of your game folder. So the line above would create the model at models/custom/my_prop.mdl.
$body adds a mesh to the model. According to the Valve Developer Community wiki, a model with no $body, $bodygroup, or $model line will be invisible. All $body meshes show at the same time. If you want parts you can switch on and off, such as a hat or a pair of glasses, use $bodygroup instead.
$cdmaterials tells the engine which folder holds your textures. The path starts inside the materials folder, and the engine does not search subfolders. A model can use up to 32 of these paths by default.
$sequence defines an animation. The wiki says every model that has polygons needs at least one sequence. For a still prop, you can use a single frame called “idle” that uses your reference mesh.
Real character models have more lines. They may include bodygroups, skin options, collision meshes, and many sequences. But the basic shape stays the same. If you understand these four lines, you can read most QC files.
A tip about file paths
Use relative paths in your QC file, not full ones like C:\Users\Name\Desktop. Crowbar’s developer has explained this on the Steam forums: file names and paths in a QC should be relative. For example, write "Folder/Extra.dmx", not the whole drive path. Also, keep your folder names short and avoid spaces and special characters. This one habit prevents many errors.
How do you compile a model with Crowbar?
To compile with Crowbar, you open the Compile tab, choose your QC file, pick the right game, and click Compile. Here are the steps in order:
- Download and open Crowbar. It is free and hosted on GitHub.
- Set up the game. In Crowbar’s setup area, choose Source Filmmaker. Crowbar needs to know where SFM is installed so it can find the right compiler and game folder.
- Go to the Compile tab. Click Browse and pick your QC file.
- Check the output folder. For SFM, the finished files usually go to the
usermodfolder inside the SFM game folder. A typical path isSourceFilmmaker\game\usermod. - Click Compile. Crowbar runs StudioMDL and shows a log.
- Read the log. A good log ends with a message that says the compile finished. If you see errors, read them from the top, because the first error is often the real problem.
Crowbar also creates missing model folders for you. Older versions of StudioMDL did not do this, so it is one more reason to use Crowbar as a beginner.
How do you compile with StudioMDL directly?
You can run StudioMDL from the command line by giving it your QC file and your game folder. StudioMDL comes with Source Filmmaker and the Source SDK. It usually sits in the bin folder.
A common command looks like this:
studiomdl.exe -game "..\game\usermod" mymodel.qcThe -game part tells the tool which game folder to build for. The last part is the name of your QC file. Some guides use the tf_movies folder instead of usermod. Both are folders where SFM can load custom content, so use the one that matches your setup.
This method is faster once you get used to it, especially if you want to compile many QC files with a script. But for a first try, Crowbar is safer.
Where do the compiled files go?
The compiled files go into the models folder of your SFM game folder, and the textures go into the matching materials folder. In most setups, that means usermod\models\ for the model and usermod\materials\ for the VMT and VTF files.
The compile creates more than just the .mdl. You will usually see files ending in .vvd, .dx90.vtx, and .phy next to it. Keep all of them together. If you move only the MDL file, the model may not load.
Your $cdmaterials line must match the real folder for your textures. If your QC says models/custom/my_prop/, then your VMT files must be in materials/models/custom/my_prop/. If they are not, SFM cannot find them.
How do you test your model in SFM?
After compiling, open Source Filmmaker and look for your model in the animation set editor. The model appears in the model list under the folder path you chose. If SFM was open while you compiled, close it and start it again, so it refreshes its file list.
Many creators also check the model in Half-Life Model Viewer (HLMV) before opening SFM. It loads faster and shows problems with the mesh, textures, and animations right away. Testing there saves time.
Look at these things when you test:
- Does the model appear at all?
- Are the textures correct, or is it purple and black?
- Does the model stand the right way up and at the right size?
- Does the idle animation play?
What are the most common SFM compile errors?
The most common errors come from wrong paths, missing files, or a missing sequence. Here are the ones beginners see most often, with simple fixes.
The purple and black checkerboard. This means the engine cannot find your texture. Check that your $cdmaterials path matches your real folder. Then check that the VMT file name matches the material name in your mesh, and that the $basetexture line inside the VMT points to your VTF file.
“Error opening SMD file.” The compiler cannot find one of your mesh files. This often happens when you moved or renamed a folder. Make sure the file names in your QC match the real files exactly, and use relative paths.
The model is invisible. You may have forgotten the $body line. As the Valve wiki says, a model without a body, bodygroup, or model command shows nothing.
“No sequences” or a model that will not compile. Add at least one $sequence line. Every model with polygons needs one.
The compile says it finished, but the model is not in SFM. Check where Crowbar sent the output. Your game folder setting might point to a different mod. Also check that the $modelname path is what you expect.
Wrong size or wrong direction. This usually comes from the export, not the compile. Check your scale and axis settings in Blender before you export again.
A helpful habit: change one thing at a time and compile again. If you change five things at once and it breaks, you will not know which change caused the problem.
Tips to make SFM compile easier
Small habits save a lot of time. Here are some that experienced creators use:
- Keep one project folder per model. Put the QC, the SMD or DMX files, and your notes in one place.
- Use short, simple names. Avoid spaces, capital letters in odd places, and special characters.
- Save copies of working QC files. When a compile works, keep that version. You can copy it as a starting point for your next model.
- Learn from other models. Use Crowbar’s decompile tab on a model that ships with SFM, then read its QC file.
- Read the log every time. The log tells you what went wrong, often in the first few lines.
- Use trusted sources. Crowbar, Blender Source Tools, and Valve’s compiler are widely used in the Source modding community. Download them from their official pages, not from random file sites.
Conclusion
SFM compile looks hard at first, but it follows the same steps every time. You export your mesh, write a QC file, run it through Crowbar or StudioMDL, and test the result in SFM. Most problems come from wrong paths or missing lines, and both are easy to fix once you know where to look. Start with a very simple prop, get it working, and then move on to characters and animations. Every model you compile will teach you something new.
Frequently Asked Questions
Is SFM compile free to do?
Yes. Blender, Blender Source Tools, and Crowbar are free, and StudioMDL comes with Source Filmmaker and the Source SDK. Source Filmmaker itself is free on Steam. You only need a computer and some time to learn the steps. You do not have to buy any extra software to compile your first model.
Do I need to know coding to write a QC file?
No. A QC file is a plain text file with short commands, and you can learn the basic ones in an afternoon. Start with $modelname, $body, $cdmaterials, and $sequence. You can also copy a working QC file from another model and change the names and paths to match your own files.
Why does my model show a purple and black checkerboard in SFM?
This means SFM cannot find your texture. The usual cause is a $cdmaterials path that does not match your real materials folder. Check that your VMT and VTF files are in the right place, and that the VMT file name matches the material name used on your mesh.